Jan 25, 2019 macOS Mojave Disk Utility Manual. Mac Secret Trick - How to Clone Mac Hard Drive with Disk Utility HDD SDD MacBook Pro iMac 2010-2019 - Duration: 10:09. YEEZY GOD 294,787 views. Summary: If you want to backup system hard drive in macOS 10.14 Mojave, you just come to the right place.AweClone for Mac can help you easily and securely backup data, or make a disk image of the system hard drive in macOS 10.14 Mojave. Just follow this guide to easily backup system hard drive in macOS 10.14 Mojave. Powerful disk cloning software for macOS 10.14 Mojave.
- Format Hard Drive For Mac
- Format External Hard Drive For Mac Mojave 2
- Best Format For External Hard Drive
To use Time Machine to make a backup of your Mac, you need any of these types of storage devices:
- External drive connected to an AirPort Extreme Base Station (802.11ac) or AirPort Time Capsule
After setting up the storage device, you can use Time Machine to make a backup of your Mac. And after making your backup, you can use Time Machine to restore files from your backup.
External drive connected to your Mac
Time Machine can back up to an external drive connected to a USB, Thunderbolt, or FireWire port on your Mac.
External drive connected to an AirPort Extreme Base Station (802.11ac) or AirPort Time Capsule
Time Machine can back up to an external USB drive connected to an AirPort Extreme Base Station (802.11ac model) or AirPort Time Capsule.
- Make sure that the USB drive is formatted for Time Machine.
- Connect the drive to a USB port on your AirPort base station, then turn it on.
- Open AirPort Utility, then select your base station and click Edit to view its settings.
- Click the Disks tab in the settings window.
- Select your backup disk from the list of partitions, then select ”Enable file sharing”:
- If more than one user on your network will back up to this disk with Time Machine, you can use the Secure Shared Disks pop-up menu to make sure that they can view only their own backups, not yours. Choose ”With accounts” from the menu, then click the Add (+) button to add users.
- Click Update to restart your base station and apply the settings.
AirPort Time Capsule
Time Machine can back up to the built-in hard disk of an AirPort Time Capsule on your network.
Mac shared as a Time Machine backup destination
To use another Mac on your network as a Time Machine backup destination, complete these steps on the other Mac:
Format Hard Drive For Mac
- Choose Apple menu > System Preferences, then click Sharing.
- From the list of services on the left, select File Sharing.
- From the list of Shared Folders on the right, Control-click the folder that you want to use for Time Machine backups.
- From the shortcut menu that opens, choose Advanced Options.
- From the Advanced Options dialog, select ”Share as a Time Machine backup destination.”
Format External Hard Drive For Mac Mojave 2
When setting up Time Machine on your other Mac computers, you should now be able to select the shared folder as a backup disk.
Network-attached storage (NAS) device that supports Time Machine over SMB
Many third-party NAS devices support Time Machine over SMB. For details, check the documentation for your NAS device.
How to format a disk for Time Machine
Time Machine supports all Mac OS Extended (Journaled) formats and Xsan formats. If the disk isn't using the correct format, Time Machine automatically prompts you to erase it when you connect it to your Mac:
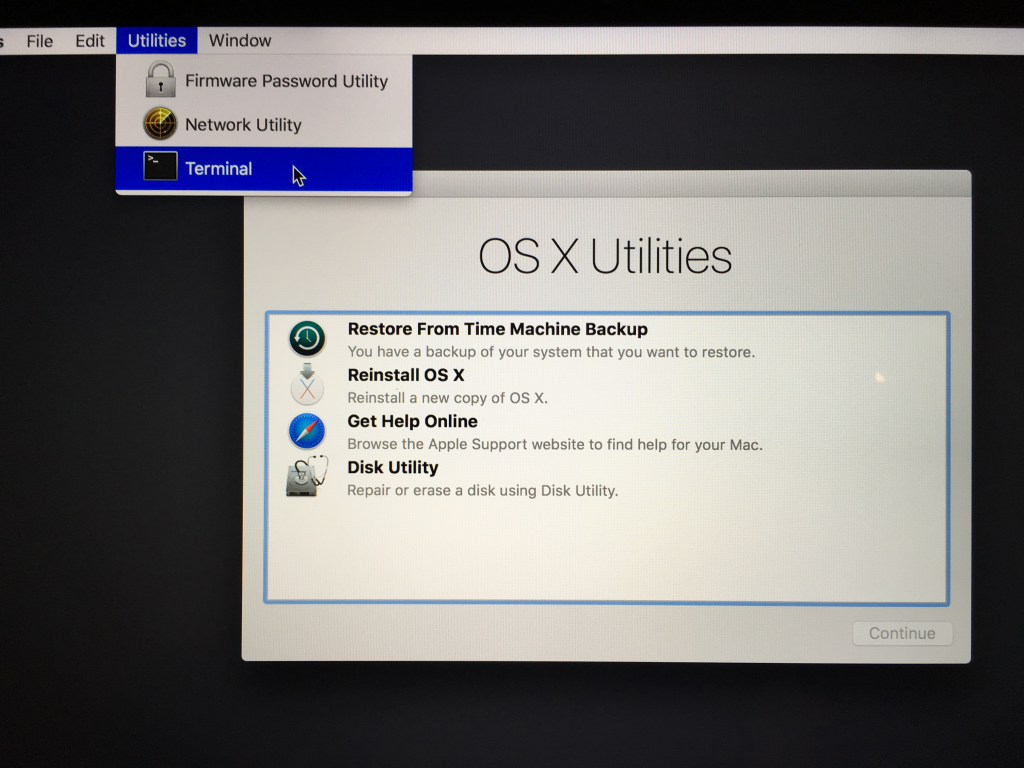
If you need to erase the disk manually, use the Disk Utility app to erase using the Mac OS Extended (Journaled) format.
Download VLC. VLC.app dmg package; Other Systems; Version 3.0.11. macOS. 48 MB. Devices and Mac OS X version. VLC media player requires Mac OS X 10.7.5 or later. It runs on any 64bit Intel-based Mac. Previous devices are supported by older releases. Note that the first generation of Intel-based Macs equipped with Core Solo or Core Duo. 

Time Machine can't back up to an iOS device or disk formatted for Windows. And if your disk uses the Master Boot Record (MBR) partition scheme, some of its partitions might not be available for use with Time Machine.
by Shirly Chen, updated on 2018-08-30 to Mac Data Wipe
'I want to know how to format a hard drive on my Mac (installed macOS 10.14 Mojave). I will give this hard drive to my friend, so I want to format the hard drive and permanently erase my data, what should I do?' - Dinna
Formatting is one of the most elementary and quick ways to eliminate all the information contained on a hard disk. But if you are going to discard, donate or sell a hard drive, it is important that all the information you have had at some point should disappear quickly and safely.
Disk Utility is an application that is included in macOS 10.14 Mojave that can format hard disks, but its effectiveness is not 100% since it can leave some traces of data that can be recovered after formatting by using data recovery software. So if you want to format a hard drive in Mac OS X 10.14 Mojave safely, we'll show you how to do it without fear and with ease.
The best way to format hard drive in macOS 10.14 Mojave
We present DoYourData Super Eraser for Mac that is a powerful and safe tool that will allow you to format hard drives safely under macOS 10.14 Mojave without leaving margin of recovery thanks to an advanced data erasure algorithm. It will not only format the disk under macOS 10.14 Mojave, it will also permanently erase all data/files on the hard disk drive so that there is no way to recover them. So it is a much safer and simpler method than Disk Utility.
DoYourData Super Eraser for Mac is very simple to use. So you can format your hard drive in macOS 10.14 Mojave and permanently remove all your information contained just by following these simple steps:
Step 1: Download and install DoYourData Super Eraser for Mac on your Mac. Once installed, run it from the Launchpad of macOS 10.14 Mojave.
Step 2: In the main interface of DoYourData Super Eraser for Mac choose the second option from the menu located on the left side 'Wipe Hard Drive'.
Jan 13, 2019 I am having the same issue with Florida Hospital applications freezing with Mojave and Citrix Workplace 1809. I uninstalled Citrix Workplace 1809 and installed Citrix Receiver 12.9.1 (56) and it no and the freezing problem is gone. So the workaround for the moment is to Downgrade to Citrix Receiver 12.9.1 and disable updates. May 02, 2018 Citrix Workspace app is a new client from Citrix that works similar to Citrix Receiver and is fully backward-compatible with your organization’s Citrix infrastructure. Mac OS 10.11, 10.12, 10.13. Download Receiver for Mac Download Receiver for. It is important that you download and install the recently released Receiver Auto Update. Citrix update for mac os mojave.
Step 3: Select the connected hard drive you want to format and click on the 'Wipe Now' button. Then DoYourData Super Eraser for Mac will start formatting and erase the selected hard drive.
Once the process gets finished, the selected hard drive will be permanently erased and formatted. It is like you get a brand new hard drive.
DoYourData Super Eraser for Mac can help you securely format hard drive under macOS 10.14 Mojave:
- Format/erase hard disk drive in macOS 10.14 Mojave.
- Format/fix inaccessible or damaged hard drive in macOS 10.14 Mojave.
- Format external hard drive, USB flash drive, memory card under macOS 10.14 Mojave.
- No damage, will never shorten the service life of the hard drive/digital device.
If you want to format hard drive in macOS 10.14 Mojave, this is the best solution. Just download DoYourData Super Eraser for Mac here:
Related Articles
Permanently and securely erase data from hard drive or external storage device under Mac OS with certified data erasure methods.
Best Format For External Hard Drive
Hot Articles
